Wednesday, February 26, 2014

Perfect Scrambled Eggs

Oh scrambled eggs, how I love you!  Simple, delicious, and quick...you are one of the best breakfasts!  Oddly enough for a dish that is as easy as 1-2-3, no one really ever talks about how to make perfect scrambled eggs.  It's not uncommon to see a plate of browned, rubber-y eggs, that when bitten into taste overwhelmingly egg-y.  Even scrambled eggs done properly aren't time consuming, it's more or less just a process of slowing down.  Something most of us could use anyway.
The ingredients for scrambled eggs are easy and straightforward.  Eggs, butter, salt and pepper.  Although there are some rules!

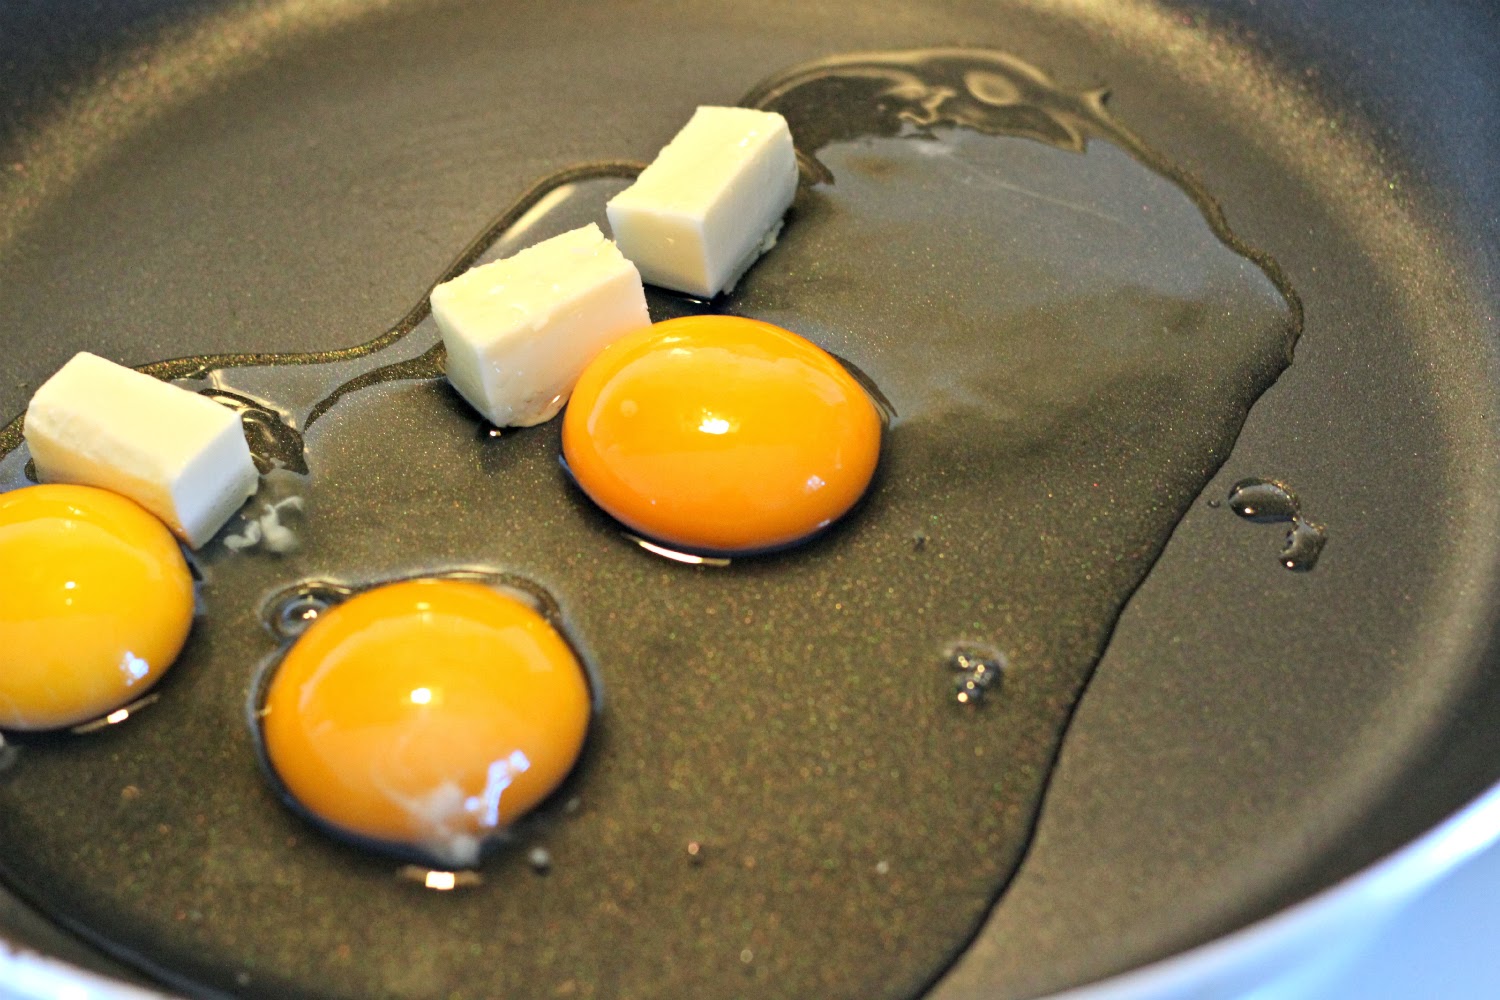
Do not add any liquid to your eggs, we're using butter.
Do not season your eggs before cooking.
Do not whip your eggs before cooking.

Look, I just excluded a lot of steps for you...and trust me...they turn out great!
Toss your eggs into your desired cooking vessel.  Turn your heat to medium.  DO YOU HEAR ME?! Medium.  Not medium high, not high, just medium.  If your stove runs hot maybe a little under medium.  You get tough, rubbery, egg-y tasting eggs when you overcook your eggs.  Please don't over cook your eggs, ok? Please?
Now start stirring your eggs.  Do not leave your eggs to just sit for any extended period of time, it's up to you to make sure they don't get brown on the bottom and soggy on top.  Stir more often for a finer consistency, and less for a chunkier consistency.
We are halfway there!
Done!  These would still be too underdone to eat (my own preference), but residual heat from the pan will continue cooking the eggs.  Stir them just a little more to finish of the cooking, and they are done!

All that's left is to plate them, sprinkle with salt and pepper, add toast or bacon, a nice hot cup of coffee and you have breakfast!  Oh and let me tell you these eggs truly are delicious.  They are velvety smooth, and have a lovely rich taste from the butter.  So remember!  Heat them slowly, add no seasoning, just butter, do not over cook, and you will have perfect eggs every time!


Perfect Scrambled Eggs

Recipe by Monica @ Farm to Table Blog
5 stars
Yield: 1-2 servings
Ingredients
  • 3 eggs
  • 1 tablespoon butter
  • to taste salt and pepper
Cooking Directions
  1. Crack your eggs into a bowl. Add your butter to your eggs.
  2. Place eggs and butter into skillet over medium heat. Stir your eggs constantly until they start to firm up.
  3. Once the eggs are mostly solid, with only a little liquid left, remove from heat and stir to cook eggs with residual heat.
  4. Plate your eggs, sprinkling with salt and pepper.
  5. Enjoy!
Shared @ The HomeAcre Hop

Monday, February 24, 2014

DIY Germination Mat


Germination.  It's when you put a seed in dirt and hold your breath till it sprouts!

Just kidding...well...kind of.  Germination is the process of a seed sprouting and growing.  Most seeds need to be in soil of a certain temperature.  For example tomato seeds like to germinate in 75 to 80 degree soil.  If they are kept in soil of that optimal temperature most likely you will see above ground sprouts anywhere between 7 and 14 days.  (Here is a chart with germination temperatures and days to sprout.) Keeping soil temperatures at optimal levels in the winter, or when starting seeds indoors can be difficult.  We keep our house cold during the winter, anywhere from 55 to 58 degrees.  Most seeds are just going to sit in damp soil and rot at that temperature!

So what's a girl to do?  Why...create her own germination mat of course!  A germination mat (also known as a heat mat) is like a heating pad of sorts.  You can buy them online and forgo making your own of course, but they can be pricey.  You place your planted seeds on top of the mat and they keep your soil temperatures right where they need to be.  When looking for ways to make my own I found a few different ways and ideas.  The one I really liked used rope lights.  It's a great idea, and honestly, one I may use in the future.  The issue was I don't have rope lights.  And they are not cheap around here either! (Not to mention all the ones I can find were LED which DO NOT produce the amount of heat you want.)  I eventually stumbled across this idea and knew it was perfect.  It's cheap, easy, and seems to be working quite well!

You'll need sand (I used about 100 pounds), christmas lights (not LED), something to hold your sand, and that is all!

Step One: Put container on table.  I found this tub in an old grainery.  That's why it's dirty.  If my mom's reading (Hi Mom!) I'd just like to take a moment to apologize to her.  I have no doubt she would have washed it.  I didn't...because I knew I was just putting sand in it!  So sorry mom!  I have a table set up in our 'laundry' room downstairs.  It's an old pressed wood table, and it sits under lights and by a big open window.  This is where I start seeds because it's out of the way and on a concrete floor.  So if it all fell over I'd only cry a little.

Step Two:  Fill tubs with lights.  After I put lights in one tub I realized I should probably go ahead and do another one.  It bothered me they were not the same heights but there was nothing I could do about it.

Step Three: Tape over open sockets.  I don't know if this was a necessary step.  But I figured it wouldn't hurt!

 Step Four: Hold down lights and pour in sand.  This is the most difficult part.  Sand is heavy, lights wanted to jump out of the box and find a tree.  I didn't want any lights sticking up but I got some.  Just write them off as festive and go with it!  This is the final step.  I know...simple wasn't it?!


The Christmas lights heat the sand, which in return heat whatever you place on it.  So far the sand temperature reads at about 120 degrees.  That sounds hot, but every time I touch it I just want to throw down a towel and lawn chair and bask in the warmth.  It seems to keep my soil at about 68 degrees, which is much warmer than it would be without the mat.  I've also been laying a black trash bag over the top.  This has done wonders!!  It creates a nice warm, humid environment.  Once my seeds sprout I'll probably lay the trash bag over at night, so they get all the light they need in the day.

See, wasn't that simple?

Do you use a heat/germination mat?

Linked Up At:

Homestead Barn Hop @ The Prairie Homestead 
The Backyard Farming Connection Hop
The HomeAcre Hop

Saturday, February 1, 2014

Purpose

Some of you may know me from The Atypical Housewife, and if you followed from there to here, well...Welcome!  If you are new please stop by the comments and say hello!  I'm looking for other like minded bloggers to follow.


I've been a "blogger" for quite some time now.  I previously wrote at The Atypical Housewife, but slowly ran out of steam.  There were so many things I wanted to talk about, but I felt inhibited by my niche or my readers.  The truth is life kind of changed when I decided to pursue a more self sufficient lifestyle.  My thoughts suddenly switched from finding a nice home in the burbs, to the logistics to raising chickens.  I started doing all this reading and research on where our food comes from, and making things from scratch.  I got chickens, and fell in love.  The next spring I added goats.  This year I hope to add more chickens, meat birds, maybe turkeys and actually get some milk from my goats.  I realized it's this life, and any scraps of knowledge I have that I want to share.


I want to show people how to plant it, grow it, harvest it, preserve it and eat it.  I want to show someone how to take that ordinary carrot from the garden, and enjoy it as a delicious, simple feast.  I hope to share recipes, how to's, tips on owning (some) livestock and more.  I have this entire list of things I hope to share, and show you.  From the best days to the worst, and all the places in between.


Are you ready for this adventure?  You better grab a cup of coffee, and get comfy because here we go!